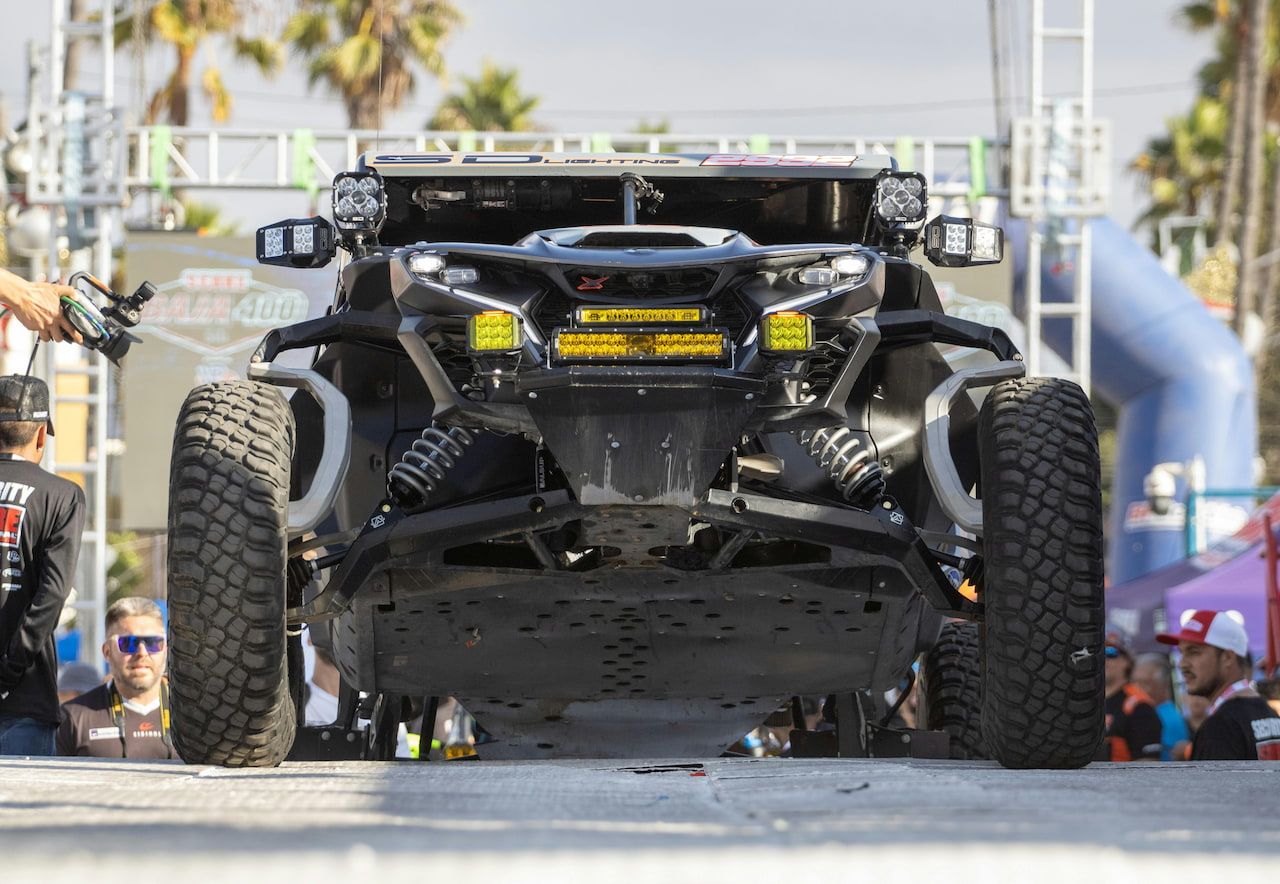
Upgrading to extended A-arms and trailing arms is a game-changer for UTV enthusiasts who want to boost performance, enhance ride quality, and tackle tough terrain without committing to a full long-travel suspension kit. These modifications provide added stability, better handling, and a more comfortable ride while preserving budget and versatility.

Understanding Extended A-Arms & Trailing Arms: What You Need to Know
Extended A-arms and trailing arms are aftermarket upgrades designed to increase the width and travel of your UTV’s suspension. This results in improved stability, a smoother ride, and better handling on uneven terrain.
Extended A-arms replace stock suspension arms, adding width and allowing for more travel. Similarly, trailing arms improve the rear suspension’s durability and adaptability, ensuring your vehicle can handle challenging trails and higher speeds. Learn more about UTV customization and performance modifications.
Benefits of Upgrading
- Enhanced Stability: The wider stance minimizes the risk of tipping, especially on uneven terrain.
- Improved Suspension Travel: Increased suspension travel enhances the ride experience, reducing jolts and bumps.
- Customization Flexibility: Extended arms are compatible with various aftermarket shocks and wheels.
Key Considerations When Choosing Extended A-Arms & Trailing Arms
Choosing the right upgrade involves evaluating several factors to ensure compatibility and performance. Shop for UTV parts and performance components here.
Key Factors to Consider
- Material and Durability: Look for high-quality steel or aluminum components to ensure longevity and resilience.
- Compatibility: Verify the upgrades fit your specific UTV model and integrate with existing shocks or wheels.
- Ride Height Adjustments: Extended arms may require additional tweaks to ride height or alignment.
- Budget and Needs: Balance cost with your off-roading demands to select the best option.
Step-by-Step Guide to Installing Extended A-Arms & Trailing Arms
Follow this guide for a smooth installation process. Explore detailed installation guides and tips here.
Installation Steps
- Prepare the Workspace: Lift your UTV securely and gather necessary tools, such as wrenches and alignment kits.
- Remove Stock Components: Detach the original A-arms and trailing arms, keeping all bolts and washers for reuse.
- Install Upgraded Parts: Attach the extended A-arms and trailing arms, ensuring proper alignment and secure fittings.
- Check Alignment: Perform a full alignment to prevent uneven tire wear and ensure optimal performance.
- Test the Upgrade: Take your UTV for a test drive to evaluate handling and suspension travel.
Maintaining Your New Suspension Upgrades
To maximize the lifespan of your new components:
- Regularly inspect for signs of wear or damage.
- Lubricate moving parts to prevent rust or corrosion.
- Ensure proper alignment after extreme use or terrain shifts.
When to Call in the Professionals
While many enthusiasts handle upgrades themselves, professional help ensures precision and safety. Rely on expert UTV services here.
Signs you need professional assistance include:
- Difficulty aligning components.
- Unusual noises or vibrations after installation.
- Concerns about structural integrity.
Main Points to Remember
Upgrading to extended A-arms and trailing arms offers an accessible way to enhance your UTV’s stability, handling, and overall performance. By choosing high-quality components and following proper installation practices, you can enjoy a smoother and more reliable ride on any terrain.
Take the leap and start customizing your UTV today with expert advice and top-tier aftermarket parts from Side by Side Fury!
